


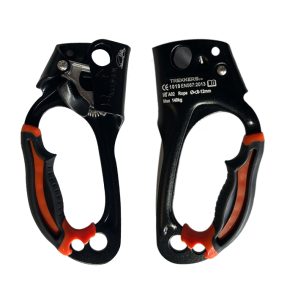
A left hand ascender is a lightweight aluminum device that lets climbers ascend rope safely using their left hand. TrekkersPK’s model offers an ergonomic grip and a locked cam mechanism, making it essential for controlled, fatigue‑free climbs. Adding it to your pre‑trip checklist ensures you have reliable ascent control before you start.
💡 Key Takeaways & Summary
- The lightweight aluminum construction reduces fatigue on long climbs.
- An ergonomic grip maintains comfort in wet or dirty conditions.
- The locked cam provides smooth, secure rope passage for safe ascents.
- Easy attachment and removal speed up transitions in technical climbs.
- Regular inspection and proper training are vital for safe use.
Why is a left hand ascender a must‑have on your pre‑trip safety checklist?

When you plan a climb, every piece of gear must earn its place in your pack. A left hand ascender, especially one built from high‑grade aluminum, offers a combination of strength, lightness, and control that few other devices can match. It allows you to climb with your left hand while keeping the right hand free for a carabiner, rope management, or a safety line.
How does the lightweight aluminum left hand ascender work?
The device features a cam that locks onto the rope when weight is applied, yet it slides smoothly when you release pressure. This “locked cam mechanism” gives you a firm grip without damaging the rope, even in muddy or wet conditions.
What should you inspect before heading out?
- Cam teeth and housing: Look for any deformation, cracks, or excessive wear.
- Handle ergonomics: Ensure the grip is free of cuts or corrosion that could affect comfort.
- Attachment points: Verify that the bolt and screw are tight and free of rust.
- Rope compatibility: Confirm the rope diameter falls within the ascender’s recommended range.
Regular visual checks and a functional test (pulling the cam while attached to a short rope) can catch issues before they become dangerous.
How does the ascender fit into a full pre‑trip safety checklist?
Below is a step‑by‑step checklist that integrates the left hand ascender with other essential gear.
- Plan your route: Study topography, weather forecasts, and emergency exit points.
- Gear inventory: List every item, confirming size, condition, and compatibility.
- Rope and protection: Check rope length, dynamic rope integrity, and bring a high strength dynamic climbing rope.
- Ascenders and pulleys: Pack the left hand ascender and a climbers rescue side swing aluminium pulley for rope management.
- Hardware: Include a carabiner aviation aluminum snap hook and a Dyneema sling for quick anchors.
- Personal protection: Wear a helmet, harness, and bring a fall arrest system for added safety.
- Training review: Re‑run mental drills on ascender use, rope handling, and emergency procedures.
- Final pack check: Verify weight distribution, accessibility of the ascender, and that all items are secured.
What are the key features to compare when choosing an ascender?
How do you correctly attach and use the left hand ascender?
Follow these steps to ensure a secure and efficient setup:
- Open the cam by pulling the release lever.
- Slide the rope through the cam housing, ensuring the fibers run straight.
- Close the cam so the teeth bite the rope evenly.
- Secure the handle to your left hand, positioning the grip for a natural hold.
- Test the device by applying gentle weight; the cam should lock without jerking.
- During ascent, keep tension on the rope with your right hand while the left hand guides the ascender upward.
What safety habits should you adopt when using an ascender?
- Always double‑check that the cam is fully engaged before bearing weight.
- Never exceed the manufacturer’s maximum load rating.
- Inspect the device after each climb for signs of wear or corrosion.
- Practice ascender techniques on a low‑angle wall before tackling a serious route.
How does the left hand ascender complement other essential gear?
When paired with a reliable rope, a sturdy pulley, and a quick‑release snap hook, the ascender becomes part of a seamless system that lets you transition between climbing, belaying, and rescue maneuvers without fumbling for equipment.

For example, a side‑swing pulley can redirect the rope while the ascender provides upward motion, and a snap hook offers a fast anchor point for emergency stops.
What are the common mistakes to avoid?
- Using the ascender on a rope diameter outside its recommended range.
- Skipping the cam lock test before the climb.
- Relying solely on the ascender without a backup safety line.
- Neglecting to clean mud or sand from the cam teeth, which can reduce grip.

Final thoughts: why the left hand ascender should be on every checklist
Including a lightweight aluminum left hand ascender from TrekkersPK in your pre‑trip safety checklist gives you a dedicated tool for controlled ascents, reduces hand fatigue, and adds a layer of redundancy to
Frequently asked questions
How should this gear be inspected before each use?
Always inspect all load-bearing points, stitching, gates, and surface wear before each activity. Retire any gear showing excessive abrasion or deformation.
What is the recommended storage routine?
Store equipment in a cool, clean, dry environment away from direct sunlight, extreme heat, and corrosive chemicals.
Who is this gear best suited for?
It is designed for outdoor enthusiasts, climbers, and professionals seeking reliable performance and safety compliance.
Explore More Field Protocols
Why a Single Leg Safety Lanyard Is Worth the Investment
A budget‑friendly climber can get top‑tier protection without overspending by choosing a quality Single Leg Safety Lanyard that meets CE standards and delivers reliable shock absorption.
Read Full Guide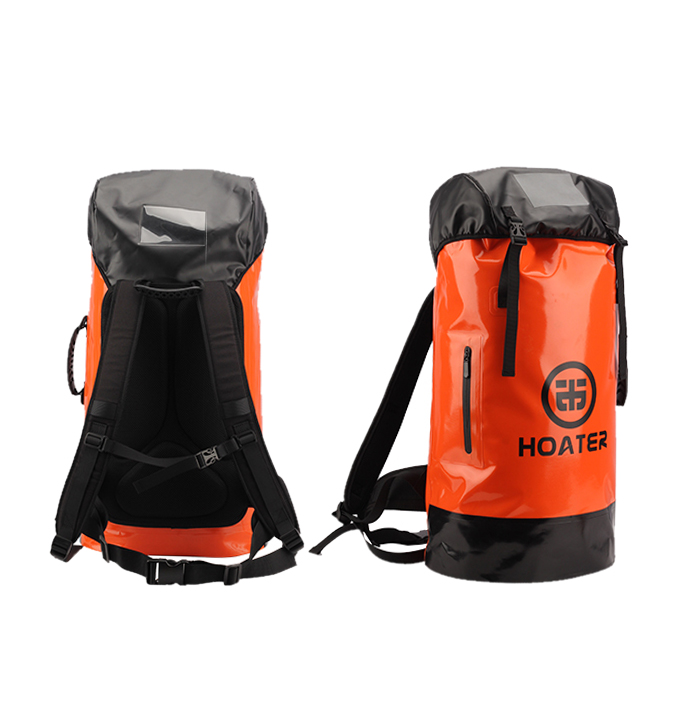
Durable PVC Mesh Bag: Budget, Value, and Quality Guide
A practical, water‑resistant 45L PVC mesh bag that delivers high durability and smart features without breaking the bank, perfect for campers and climbers.
Read Full Guide
Dynamic Climbing Rope Features Explained for Safe Climbing
A clear, jargon‑free guide to the most important features of a high‑strength dynamic climbing rope, helping you choose the right gear for safe and enjoyable climbs.
Read Full Guide